Showing posts with label Main Dish. Show all posts

Wednesday, February 6, 2013

Meatball Stroganoff


This recipe is hands down one of my favorites. It is simple, it is delicious and it is quick. It has a space in my big black book of recipes. But what if something happens to that big black book of recipes. Losing this recipe would be kind of tragic. 

Especially, since I want my children to have access to it when they go off to college someday. This is what I would consider an easy college recipe. I try to develop recipes for my children that they can both afford and make when they are on their own someday. And then I teach them how to make it.

I already know that my son is going to live off of meatball sandwiches in college. He loves those things and by purchasing a premade bag of meatballs he could probably feed himself for a week. He makes them for himself all the time now and he is only 14. As I fed him this the other night and he gushed over how much he prefers when I make it with meatballs as opposed to beef slices. (whatever wierdo.) I knew that this could be an alternative recipe for the big giant bag of meatballs I know he is going to buy to sustain himself someday. 
 

But it is pretty awesome for this Mom that needs something filling and fast to feed her hungry family on exhausting, busy weeknights. You could use your own meatballs. But I am not going to lie, I keep a bag of store bought meatballs in my freezer all the time just for dinner night emergencies. You can also substitute a chuck roast sliced thinly, or ground hamburger for this recipe as well.

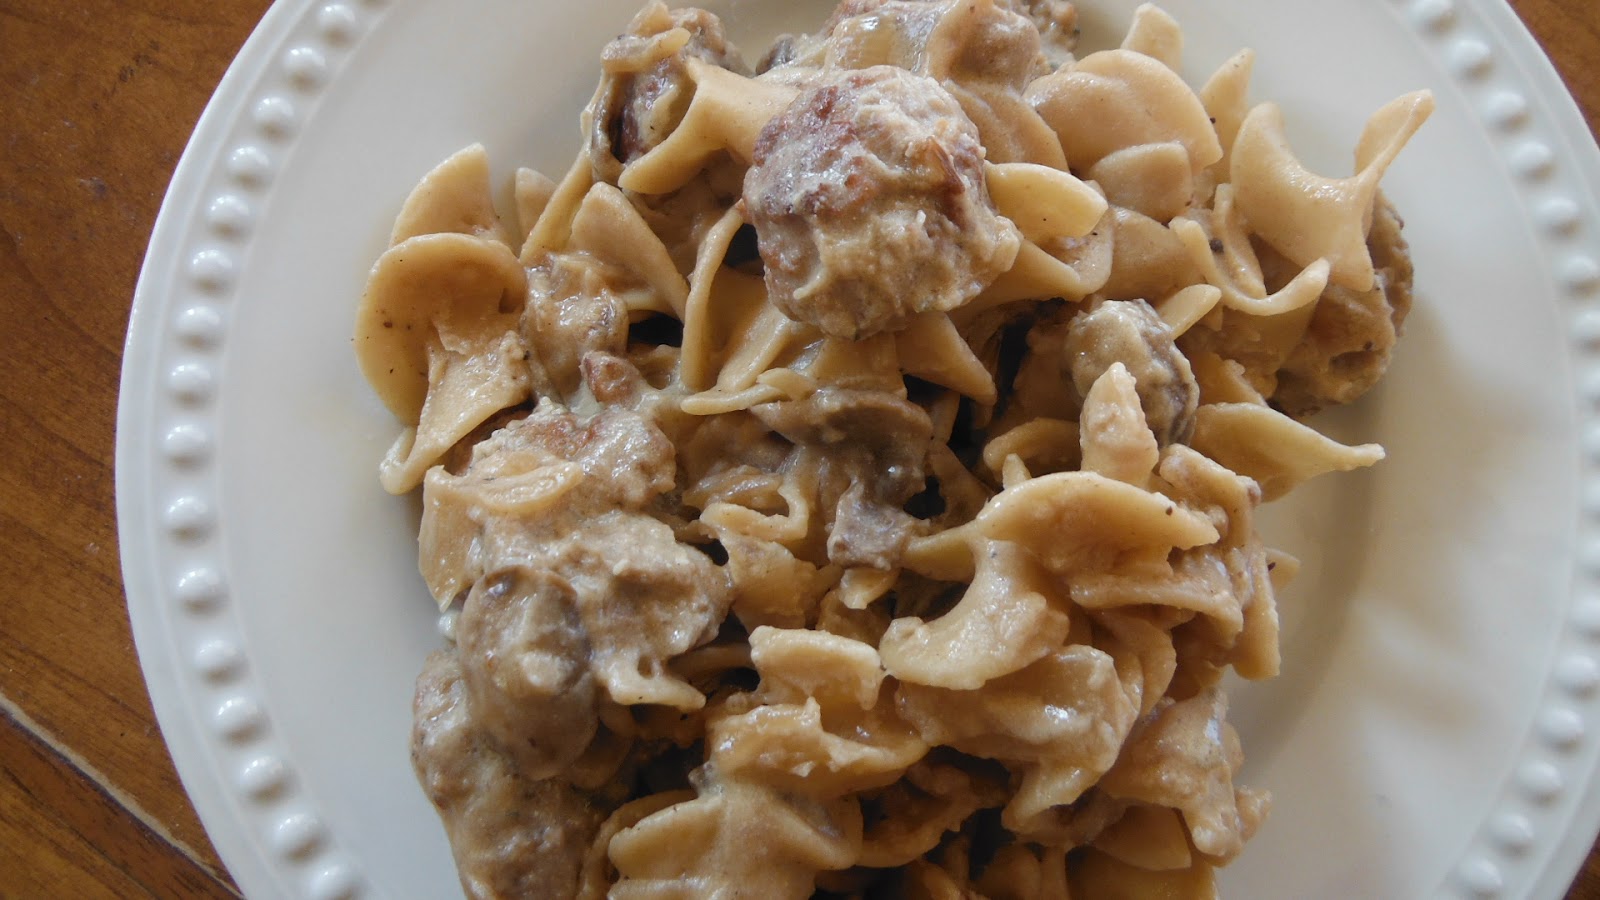
Meatball Stroganoff. 
This fed 6 people (it can be cut in half)

About 20 meatballs (if using frozen, defrost for 1 minute in microwave)
1 onion chopped
12 Fresh mushrooms sliced
1 Tb of olive oil or vegetable oil.
1 packet of Onion Soup mix
3 TB of flour
3 Cups of hot beef broth. or 2 beef bullion cubes and 3 cups of hot water
salt and pepper to taste
1 Cup of Sour Cream
1 bag of egg noodles.

 Directions:
  • Heat oil in a large saute pan. 
  • Brown meatballs and add onions and mushrooms.
  • Once meatballs are tender, cut in half. Cook until onions are beginning to look transparent.
  • Sprinkle with soup mix and flour and stir to coat. 
  • Season with salt and pepper.
  • Add hot beef broth. 
  • Simmer on top of stove for about 10 minutes.
  • Meanwhile cook pasta to al dente. 
  • Stir in sour cream and serve immediately over noodles.


Wednesday, April 18, 2012

Stuffed Italian - Mozzarella Meatballs & Gruyere Mushrooms


RECIPE TRIAL:

I love Italian food for so many reasons, but I especially love it because it has so many stuffed foods. Yummy delicious food on the outside -- more yummy (usually cheesy) stuff on the inside. It's all about the layers of goodness with Italian food. I have been wanting to try meatballs stuffed with mozzarella forever. And I love a good sausage meatball. So I came up with these tasty mammoth meatballs.

And on the side? I just had to serve some stuffed mushrooms. Mushrooms are how I get my husband to eat his vegetables or at least something resembling a vegetable. And who can resist these simple stuffed mushrooms? No one I tell you, No one. I used some Alouette and Gruyere for the mushrooms. The Gruyere comes from an artisan cheesemaker in Cedar City for all my Cedar City readers. Nature Hills Farms has some delicious cheeses and one of my faves is her gruyere.

Stuffed Meatballs
1 lb of mild Italian sausage, removed from casings
1/2 lb of ground pork
1/2 Cup of panko bread crumbs
1/4 Cup milk (we used soy milk and they turned out fine)
1 egg
1 Tb Worchestire sauce
1/4 tsp kosher salt (or to taste but the sausage is pretty well seasoned)
2 garlic cloves minced
Few dashes of ground pepper. 
Fresh mozzarella, drained well -- Fresh in the water mozzarella pearls work great. Don't use cheese sticks. The fresh stuff is just better for this recipe.

Directions:
Preheat oven to 375 degrees. Line a cookie sheet with foil and spray with cooking spray.

Combine all meatball ingredients in a large bowl (minus the mozzarella) and stir until combined.

Form meatballs by taking approximately 1/4 cup of meat and forming into ball. Place on cookie sheet and form a well in top of each meatball. 


Add mozzarella  pearls to wells. 

Close tops of meatballs around pearls and cook for 35 to 40 minutes until golden on top and no longer pink.

Serve with your favorite marinara sauce (aka gravy) and some pasta. 

Stuffed Gruyere Mushrooms
So easy it is ridiculous.


Mushrooms, however many you want. Stems removed,
Herbed Alouette spread
Grated Gruyere

Heat oven to 425,

Stuff mushroom caps to top with Alouette.

Sprinkle with gruyere.

Place in a baking pan and bake for 10-12 minutes or until gruyere starts to get golden.

Serve warm.
Like I said -- Easy!

Saturday, March 31, 2012

Creamy Tomato Baked Scallops: A Paleo Recipe


Here is a great recipe that follows the guidelines of the paleo diet. This diet is based on the principle of examining the ways humans historically ate during the Paleolithic period of development, from approximately 12,000 to 200,000 years ago.

The idea behind the diet is that our digestive and cardiovascular systems were not evolved to deal with many of the processed types of foods we eat today and that we don’t eat enough of the food groups that were vital to humans during this historical period of development. Paleo diet advocates theorize that the difference between our diet today and then (along with our increased sedentary lifestyle) may contribute to our sky-high rates of heart disease and diabetes.

The diet encourages eating lean meats and poultry, as these would have been a significant source of protein to our ancestors. The diet is also encourages eating nuts and seeds, game meat, fish, shellfish, fruits, and vegetables. In the diet, people are encouraged to avoid eating dairy, cereal grains, high-salt foods, fatty meats, and sugary foods and sweets, often which are the basis of a lot of recipes taught in cooking schools today.

How the Recipe Fits In

The recipe I’m bringing you today is Creamy Tomato Baked Scallops. This recipe is excellent because it’s easy to prepare and cook, and the only truly special ingredients you’ll need are the fresh scallops themselves. The recipe encourages using fresh scallops rather than frozen ones, as these have a much nicer texture.

The recipe’s main ingredients are seafood and vegetables, including onions, garlic and tomatoes. It uses a small amount of coconut oil, which is on the paleo list of items to consume in moderation. This is a great pantry recipe, too, because tomato sauce and coconut milk are key ingredients and you’re likely to have these around the house. The recipe doesn’t require any crazy spices (only oregano, salt, and ground black pepper, although any Italian spices would probably be a great addition). Scallops are often a hit with picky kids. My 5-year-old will generally only eat chicken breasts, but I could easily talk her into eating this dish once she had a bite.

Cooking

This scallop recipe is made by sauteing the garlic and onions in coconut oil, then adding the tomato sauce and coconut milk. This mixture is then poured over the scallops, which are placed on the bottom of a baking dish. I love baking recipes, as you don’t have to constantly watch and stir a pot. To become a real culinary expert or interested in learning more about cooking skills, consider getting a culinary degree online.

Keep an eye on your scallops, as overcooking them will lead to a chewy texture. If you have smaller scallops, they will take less time to cook. Don’t forget to spread your diced fresh tomatoes on top of the mixture before you put the pan in the oven. If you enjoy this recipe, consider other recipes that are paleo diet-friendly, as this could lead you – and your family – down the path to healthier and happier eating habits.

Sunday, February 5, 2012

Lamb Chops W/ Mustard Crust


Recipe Trial: In my quest to try a new recipe every week.

Lamb is part of my winter menu. I bought that whole half of a lamb this year and I am trying out all kinds of new recipes. This is one of my new favorites. I found this recipe at Sheep's Creek Farm Lamb Recipes. My lamb chops were little and so we could pick them up like they were dainty little chops meant for finger food. But this will definitely work with a bigger chop.

I really love how quick this recipe came together. It took less than 30 minutes (Actual cooking time is around 10 minutes) to make these lamb chops and they were seriously so good. The seasoned bread crumb crust is definitely going to find its way onto other meat recipes.
  • 8 large Lamb chops (rib) or 12 small chops
  • 2 teaspooons kosher salt
  • 1 teaspoon coarse ground black pepper
  • 4 Tablespoons olive oil
  • 2 teaspoons minced fresh Rosemary
  • 2 Teaspooons minced garlic
  • 3 Tablespoons fresh French or hearty Italian bread crumbs
  • 4 teaspoons Dijon mustard

Preheat the broiler or grill. (I used the broiler and my broiler pan) Season the lamb with ½ teaspoon of salt and pepper, then drizzle with 2 tablespoons of the olive oil. Grill or broil the lamb chops for about 3-4 minutes on each side. Remove from the broiler.

For the crust: In a a small bowl combine the rosemary, garlic, and bread crumbs. Drizzle the bread crumbs with the remaining olive oil and season with ½ teaspoon of salt and ½ teapsoon of pepper. Liberally cover one side of each lamb chop with mustard, then pack the bread-crumb mixture on top. Place in oven at 350° F. to brown the crust.

Wednesday, January 11, 2012

Iskander Lamb Kebabs W/ Tatziki


Recipe Trial #2
Here is how my dinner prep time goes. "Mom, when can we go buy my new shoes?" Mom I don't understand this math problem." "Mom can you sign my homework." Mom have you seen . . . 

You get the picture -- everybody in my family needs me the moment I start cooking in earnest. It is kind of ridiculous. By the time I sit down to the table I am just thinking. "hurry pass me some food before I pass out." Which is why I forgot to take a picture and all that was left for a photo op was this half of a lamb kebab. At least we know everyone liked their dinner.  


I love Lamb and yogurt together. They are a match made in heaven. Which is why I love these kebabs. I have made lamb before but never grilled with a yogurt marinade. 


There are two yogurt recipes here: The marinade and the tatziki spread which we used to spread on our pitas for kebab gyros. Yummers! 


The Iskander KEBABS from my 501  low carb Recipes cookbook.
Soak 8 bamboo skewers in water for at least an hour to prevent scorching or flaming skewers


2 Lbs of boneless lam cut into cubes (I used the leg of lamb)
1/4 Cup greek yogurt
1/2 Tb of fresh lemon juice
1 garlic clove crushed.
1/2 tsp of fresh thyme. (I literally went and picked some from my yard. It is still growing!)
Salt


Thread lamb onto presoaked skewers.
Combine yogurt, lemon juice, garlic clove and thyme in a bowl. 

Brush lamb skewers with yogurt. Grill on heated oiled grill until browned or cooked as desired. I like mine with a touch of pink.

Serve dipped in tatziki sauce or in a gyro with feta, red onions and tomatoes.


Tatziki Dip
This requires some planning. It needs to sit and rest for about an hour  and if you use plain yogurt it needs a couple hours. of preplanning. I love tatziki. I am mopping up the leftovers with a piece of sourdough bread as I write this.

2 Cups of Greek Yogurt (you may use plain yogurt but you will need to wrap it in cheesecloth or a tea cloth and let it drain for about an hour.
1 large cucumber, peeled and seeded, chopped
3 garlic cloves, diced
3/4 tsp salt
2 TB lemon juice
1 TB dill, chopped or 1 tsp dried.
1 TB mint chopped or 1 tsp dried


Place yogurt in cheese cloth or paper towel and allow to drain suspended over bowl for 20 minutes to an hour. Greek yogurt does not need to drain as long. 


Place cucumbers in a colander and sprinkle with some salt. Allow to drain in sink for about 20 minutes. We are trying to remove water from the cucumbers.


Add cucumbers, 3/4 tsp salt, lemon juice and garlic to a food processor. Pulse 3 or 4 times. Remove mixture, place in paper towel and squeeze excess water from mixture.


Add to Greek yogurt and add dill and mint. Allow to sit in the refrigerator for at least 30 minutes.


Use as a spread or dip with pita wedges, veggies or meat.


Thursday, February 24, 2011

Kielbasa Cabbage Stew W/ Latkes

Sweet potatoes and cabbage usually get a bad rap at my house. There are naysayers; people (certain family members) that won't eat these foods on most occasions. This soup (chock full of cabbage) however gets eaten every time I make it and the Latkes or potato pancakes are one of my favorite sides, especially with this hearty stew. Serve on top or as a side dish with a dollop of sour cream.

Both of these recipes have a pretty simple ingredient list and are easy to make although they do require some chopping and shredding.

I used my Bosch shredder to shred all the potatoes and onions for the latkes and that process went pretty quickly.

Potato Latkes

2 russet potatoes -- shredded
1 sweet potato -- shredded
1/2 small onion -- shredded
1 egg. beaten
1/4 cup of flour
salt and pepper to taste
Canola oil

Combine all ingredients except oil in bowl. Heat 1/ 4 inch of oil in a frying pan until hot. Add dollops of potato mixture. Press down slightly with the back of spatula.

Fry until golden brown on each side. About 3 minutes.


Kielbasa Cabbage Stew

4 Carrots chopped
2 celery ribs chopped
1 small onion chopped
1 keilbasa, sliced in 1/4 inch slices. I have also used 5 bratwursts in this stew )
3 Cups chopped cabbage
3 cans of chicken broth
1 can of Northern white beans
1/2 tsp garlic powder
1/2 tsp dried basil
1/2 tsp dried thyme
1/2 tsp salt
1 tsp olive oil

Heat a large saucepan over med heat. Saute onions and celery for about 3 minutes until onion starts to get tender. Add chicken broth, carrots and herbs and salt and pepper.

Bring to a boil and then reduce heat and simmer 15 minutes.

Add chopped cabbage and cover and cook additional 10 minutes

Stir in kielbasa and beans and heat through about 5 more minutes.

Serve with Latkes or hearty bread

Saturday, February 19, 2011

Tale of 3 Olive Oils and Roast Chicken legs


I have an olive oil habit. I cook with it at least once a day. Until today I have been a strict user of 100% Extra Virgin Olive Oil. I never knew what the other olive oils were for. I avoided them like the plague. So, when I got the opportunity to test run 3 different olive oils from Crisco -- I took it. I thought, maybe I have been missing something. And truth be told I have been afraid to use any kind of olive oil that didn't come from a bottle that looked old and Italian. See what a slave I am to packaging. It was time to be open minded. After all, olive oil that comes from a bottle that looks like it comes straight from Italy can be an expensive habit for this gal that NEEDS to stock her pantry with olive oil. This week 3 bottles of olive oil from Crisco arrived on my doorstep and I have been busy trying all of them.

This summer my husband and I stopped at a balsamic vinegar and olive oil tasting boutique in So. California. We were kind of in heaven in there. So, I decided to do a little taste test of each olive oil I recieved in the mail. Pour a tsp in a bowl and dip finger in bowl.
The extra virgin olive oil obviously had the strongest and best flavor.The Pure olive oil was milder and the Light olive oil had not taste.
But mostly I have been cooking. And I have discovered a few things. I used to think the different olive oils had something to do with the fat content. Not so, these three olive oils difference is in taste quality. If you want a good strong olive oil flavor go for the virgin olive oil, which has not been refined, but cold pressed directly from the olives.

For a mild olive oil flavor such as used in baking or roasting use the Pure Olive Oil which is a blend of virgin and refined olive oil and if you just want a healthier oil than veggie oil to stiry fry or fry your food in without a strong olive oil taste use the heavily refined light olive oil -- which is virtually tasteless.


Pure Olive Oil is awesome for roasting meat or making marinades. I made this extremely tasty roast chicken legs with it. Recipe below. I also added it to a salmon marinade. And the salmon turned out fantastic.

Light Olive Oil - I wanted to lightly stir fry some smoked sausage without adding a lot of olive oil flavor. I used the light olive oil for this and it worked perfectly.


Extra Virgin Olive Oil -- My favorite use of olive oil is to blend it with some aged balsamic vinegar, shredded parmesan and dip a crusty hunk of bread in it.  Extra Virgin Olive oil is best used as a dip, in salad dressings or to drizzle over a finished dish. It is also good with roasted veggies to add a level of depth to the flavor.

My easy roast chicken legs. This recipe is simple and aside from the chicken really only needs stuff you should stock in your pantry.

6-8 Chicken leg/drumstick pieces
2-3 TB Olive Oil (I used the pure)
1 tsp of fine sea salt.
1/2 tsp of pepper
1 pkg of dried Italian dressing mix.

Heat oven to 400 degrees farenheit. Line a baking dish with parchment paper (keeps the chicken from sticking to the dish).

Place chicken pieces in dish. Loosen the skin and pull some of it away from meat. Drizzle olive oil over chicken. Sprinkle meat with salt and pepper and Italian Dressing mix. Rub seasonings into meat.

Roast for 30 minutes at 400 degrees, Lower temperature to 350 degrees and continue cooking for 10 to 20 minutes or until juices run clear when poked and skin starts to brown.

Dig in.

Wednesday, February 2, 2011

Mediterranean Style Tuna Lasagna


Featured Food Storage or Pantry Item: Tuna Fish

I am so in love with the sauce in this lasagna. It may just be my new favorite way to use canned tuna. I know it sounds scary. Tuna in lasagna? But the Italians often add tuna to their pasta dishes. Yes, canned tuna. Now granted they use tuna canned in oil and I don't buy my tuna in oil but there is an easy remedy for that in this recipe.

This recipe is so easy and the homemade sauce (which is also simple) tastes so much better than the canned spaghetti sauce. I promise you will love this different way to use your tuna. Plus it is a cheaper version of lasagna especially if you buy your tuna on sale like I do. Raise your hand if you get sick of tuna casserole. I mean if I had to live off of Tuna I would be tired of all those cream based recipes out there. That is why I am so excited that it can be made into a tasty red sauce for lasagna.

Now I played with a recipe I found on the internet and I found that this sauce really only makes enough for a half lasagna -- 6 hefty servings. (which is perfect for my family of 5). Double this recipe if you want to make a bigger lasagna.

8 No boil lasagna noodles
2 Cans tuna (in oil or water)
1 Tb of Olive Oil if using tuna canned in water
1 green or yellow bell pepper (I actually used a seeded anaheim and it turned out great)
2 cloves of garlic (chopped)
1 can crushed tomatoes (12 oz)
2 TB basil
2 TB of Italian Seasoning
1 Tsp of Crushed Red pepper
1/4 cup chicken broth
2 eggs
1 carton of part skim
Ricotta (smaller carton)
1 Cup of shredded white or medium cheddar
1/8 Cup shredded parmesan cheese.

Heat oven to 350 degrees farenheit.

Heat oil from tuna can or the olive oil in a skillet over medium heat. Add chopped garlic to olive oil and cook for about 1 minute.

Add tuna and chopped pepper to the oil. Heat through and add crushed tomatoes, crushed red pepper and 3/4 of the basil and 3/4 of the Italian seasonings. Add chicken broth and simmer for 10 minutes or until partly reduced and thickened.

Mix ricotta and eggs.

Layer igredients in a 9x9 pan. 2 Noodles, sauce, ricotta mixture, a small handful of cheddar cheese. Repeat until you reach the top of dish. Top layer should be noodles, sauce, ricotta mixture about a half a cup of cheese, parmesan cheese and remaining basil and italian seasoning. (In the picture you will see that I did not top my last noodle layer with sauce. The topw was too crunchy. Don't do that.)

Bake uncovered for 30 minutes.

Wednesday, December 29, 2010

Calzone Pie Pockets

It was one of those nights. My plans for dinner went awry when I realized I had no whipping cream and no sun dried tomato pesto left. I hate when that happens. I am the kind of gal who needs to plan her meals in advance or I have no desire to cook come dinner time. And so I wondered what to make at 6:30 tonight when the kids came in from their swimming, play dates and air soft gun wars. They were famished and all I had was frozen food and no plan.

Then I thought hmmm. I have one more uncooked pie crust defrosted and lots of lunch meat and cheese. I decided to make a family favorite -- a version of Rachel Ray's monster calzone. The recipe usually calls for a pillsbury bread dough. But I rarely have that in my refrigerator. I decided to give it a go with the pie crust.


This recipe is great because you can basically use any lunch meat and cheeses you have in your house and as I found out you can use a premade pie crust -- which I always keep stocked in my freezer from my bulk pie recipe. I have mentioned before that I like to store vaccum packed pepperoni and salami in my food storage. This recipe makes good use of those meats.

One pie crust really only makes 2 large calozones. I would suggest using two pie crusts for 5 people.

For 2 Large calzones
1 pie crust rolled out and cut in half.
Several slices of pepperoni or other lunchmeat. (we used roast beef this time)
4 to 5 slices of thinly sliced ham.
4 slices of genoa salami
4 slices of provolone or meunster cheese.

1 tsp of olive oil
shredded parmesan cheese

marinara sauce (optional for dipping)

Cut rolled out pie crust in half. Layer meats and cheese slices on one side of each half.

Carefully fold over. Pie crust is much more delicate and temperamental than bread dough. You may need to pinch and patch your crust until any holes are filled.

Brush with olive oil and top with shredded parmesan cheese.

Bake at 400 degrees farenheit for about 20 minutes or until pie crust is golden and flaky.

Tuesday, August 31, 2010

Philly Roast Beef Subs

I love a good Philly Cheese Steak sandwich. (I used to live in PA.) I also love a quick dinner solution. Which is how the Philly Roast Beef Sub was born in my house last week.

There are a couple of reasons I store extra meat in my food storage. I have been in dire times before and I know its a good idea to have a back up food plan. But I also love the convenience canned roast beef brings me on a late soccer game night. Of course, nobody needs to eat that roast beef straight out of the can. Just look at the tasy beautiful thing you can do with roast beef with just a few spices and ingenuity. Now this roast beef comes from my home canned quarts. You can learn all about how to can your own roast beef here. Feel free to use store bought canned roast beef or leftovers. It's all good.

I also used a green pepper and onion from my garden. It is my goal to eat something from my garden everyday during harvest season. I can't think of a more lovely way to use a green pepper.

I did get the seasoning (I slightly altered ) from the meat from a recipe for Philly Steak sandwich from user Swizzlesticks on allrecipes.com

The Philly Roast Sandwich

1 quart of roast beef, shredded. I would say that it turned out to be about 3 cups.
1/2 tsp salt
1/2 tsp black pepper
1.2 tsp chili powder
1/2 tsp onion sal
1/2 tsp garlic powder
1/2 tsp oregano
1/2 tsp basil or 1 tsp fres basil

1 onion sliced
1 green pepper, julienned
1/2 cup mushrooms (otional)
Slices of swiss or provolone cheese

4 Hoagie rolls.

1. Mix beef and spices together in a large microwavable bowl. Heat in microwave for 2 minutes.
2. Heat a Tb of oil in a skillet and saute onion, green pepper and mushrooms until tender.
3. Divide meat between rolls and top with onions and ppers. Top with cheese.
4. Place on cookie sheet and broil until cheese is melted. I leave my rolls open so the cheese melts and toasts and the bun gets a little crispy.

Wednesday, August 18, 2010

Retro Saucy Pork Chops


I feel so retro everytime I make these pork chops. I almost feel as if June Cleaver from "Leave it to Beaver" is going to walk into my kitchen.  I imagine her and every June Cleaverish or "Blast from the Past" mom cooking these pork chops for her family. But that does not stop me from baking these moist saucy chops up for Sunday dinner. They are easy and I promise you have these ingredients on hand. So despite the fact that I feel extremely old fashioned when I make these tasty chops they are in my big black book of recipes because we all clean our plates on saucy pork chop night, especially the picky 5-year-old.

Don't miss the $40 CSN Stores giveaway http://pantryeats.blogspot.com/2010/08/get-in-kitchen-40-csn-giveaway.html

SAUCY PORK CHOPS
5 to 6 pork chops. I have used both bone-in and boneless.
1 can cream of chicken soup
1/2 yellow onion sliced thinly
3 Tb catsup
2 tsp of worchestire sauce
olive oil
salt and pepper.

Heat 1 TB olive oil in saute or fry pan.  Season chops with salt and pepper and brown both sides in heated pan.

Mix soup, onion, catsup and worchestire.

Place pork chops in casserole dish and top with sauce.

Bake for 45 minutes.

Friday, June 11, 2010

Chicken and Cheese Stuffed Shells

Pasta is a staple in my menus and my foodstorage. However, I do not believe that pasta only comes in one shape and therefore I keep different pastas on hand in my pantry. Manicotti and Jumbo Shells are two of my favorites. They have so many storage possibilites and stuffed they are delicious.
So, I am going to give you three ways to make these. First. the no boil method which happens to be my favorite, Second, the make ahead directions which can be frozen until ready to use. Oh the possibilities. Finally the standard boil version.

The No-Cook Method (my favorite)
1 Carton of Jumbo Shells (uncooked)
 1 3/4 Cups part skim ricotta ( did you know you can make your own. Will be experimenting with this soon.)
2 Cups shredded mozarella
1/4 Cup grated parmesan cheese. (the canned stuff stores for a little while)
2 TB fresh parsley or 2 tsp dried
1/2 tsp salt
1/4 tsp ground pepper
1 can or 1 cup of chicken (drained)
3 cups (26 oz. jar) of spaghetti sauce
1 cup water.

Stir together cheeses, chicken, parsley, salt and pepper. Spoon into uncooked Jumbo shells.
For sauce heat sauce and water to boiling.
Cover bottom of casserole dish with a layer of sauce.
Add a layer of stuffed shells, and cover with more sauce.
Add another layer of shells, Cover with remaining sauce. Sprinkle with additional parmesan cheese.
Cover. and bake at 400 for 35 minutes.

Make Ahead Freezer Directions.
We often do not eat a whole box of stuffed shells, so this recipe works for when you want to make some and freeze the rest for later. Hello instant, impressive Italian meal. OK, almost instant.

The only difference with the ingredients is that you omit the water from the sauce and you do not heat the spaghetti sauce. Boil box of jumbo shells in salted water for 10 minutes or until al dente. Drain in colander. Fill shells with filling. Place in a freezer safe container and layer with sauce, shells, sauce, shells, sauce.

Cover with a plastic wrap or other lid and freeze up to 2 months.

To bake, heat oven to 350 degrees and  bake for 2 hours if frozen or 40 to 50 minutes if defrosted.

Standard Method.
Boil jumbo shells, stuff with filling and layer shells and sauce in casserole. Cover and bake at 350 degrees for 35 minutes until hot and bubbly.


Tuesday, May 25, 2010

Grilled Sourdough Pizza Melt


Let's talk pepperoni. Pepperoni is versatile and practical. It can be stored for at least 4 months on the shelf (if you buy the shelf pepperoni), in the refrigerator or longer in the freezer. It is relatively inexpensive and it is well-loved on pizzas everywhere. It is therefore a fun addition to your food storage.

So, in case you are wondering what a pizza melt has in common with the theme of this blog it is that I always keep pepperoni on hand. And when you are eating out of your food storage or pantry it offers a comforting change of pace. You can add it to so many things. Although we are going to discuss canning meat in the next couple months ( I got a new and huge pressure canner) today I am urging you to add a little simplicity and variety to your store of meat. After all, we don't always want to eat tuna fish and canned chicken.

This Pizza Melt is a different way to grill up some pizza heaven. If you are a bread baker you can always whip up some of your own sourdough bread. I cheated and bought the daily discount bread from the bakery. $1.45 for a loaf of heavy bakery bread is a steal and I would be lying if I told you I always bake my own bread.

The Pizza Melt

butter or margarine
a pack of pepperoni slices.
shredded cheese ( stock up on shredded cheese when it is on sale and throw it in the freezer.)
1/2 cup of pizza sauce.
sourdough bread slices
olives -- optional

Heat a grill on the stove to medium. Butter one side of each slice of bread. Coat one slice with pizza sauce, layer with cheese, pepperoni and olives. Top with remaining slice of bread and grill until golden. Turn and repeat.

Easy!

Friday, May 14, 2010

Heritage Cooking and Shoyu Chicken

It is shameless promo time again. Yep, May's issue of Alive! Utah is up and that means we have an all new Taste section. I did not write the feature article this month. It was written by my new friend Adrianne Tawa. But she has a lovely article discussing the role of cooking as a part of our heritage. We all bring our mothers or fathers into the kitchen with us when we cook. I love when I cook my Grandma's recipes. It is like I can feel her puttering around the kitchen.

Adrianne's lovely article is followed up by some absolutely yummy Polynesian recipes. She lived in Hawaii (although she spent much of her life in Utah) and married a native Polynesian from New Zealand. Therefore, Polynesian cooking has become a huge part of her family's heritage. So if you are feeling like a little reminiscing about the cooks who shaped your early kitchen experiences or if you just want some easy and delicious recipes hailing from the islands go check our latest Taste section. Heritage Cooking

I did, however, write the accompanying article on How to Make Your Own Cookbook online.
An excerpt:

"Little scraps of paper tucked into boxes, handwritten recipe cards splashed with sauce and smudged with flour: is this the state of your family recipes? Well-loved recipes are a family treasure. In many ways they are a part of our family history. Fortunately, technology creates better organizing and preserving solutions for these kitchen treasures?"
The article: Make Your Own Cookbook

Wednesday, May 12, 2010

Creamy Hamburger Stew

It snowed in Southern Utah today, it snowed last week and the week before that. We are all a little ticked off here. We are cold and we want our sun back. Hey, I will even take the wind if it would just warm up and be Spring. So, that is my preface to a blog post on a creamy hearty stew recipe being offered up in May. Sometimes when you are feeling a little put out by the weather you just need warm comfort food, And this stew hits the spot. You should have seen the dissapointment when I announced that weekly soup day was a thing of the past for the next few months last week when I served up this family (and mommy favorite). WHAT? WHY? "Because it is just going to be too hot," I told my loyal soup  lovers. And then it went and snowed again today and I realized there will be a few cold blustery days ahead of us (and they better be just a few) and we,and maybe you, will need a good comforting soup to warm yourself up.


I have been making this easy soup that relies on basic veggies and pantry staples for years. You can also make substitutions and this soup still works. Substitutions below.

1 lb hamburger
1 tbsp of montreal steak seasoning.
1 tbsp of steak sauce (a.k.a A1)
3 Tb of dehydrated onions or 1/2 Cup onion chopped
1 tsp of garlic powder.

2 Cups of tomato juice or 1 1/2 Cups tomato sauce plus 1/2 cup to 1 Cup of water.
1 C. Potatoes, peeled and cubed
1 C. Carrots, sliced thin or shredded
1 C. or 1 Can of corn, drained. or 1 C. Lima beans
1 to 1  1/2 tsp salt
1 cup fresh swiss chard leaves or spinach leaves (optional)

White Sauce
2 T. butter
2 T. flour
2 C milk

Brown hamburger in large skillet with seasonings and onions.

Add tomato juice or sauce/water, vegetables and salt. Cover and simmer until veggies are soft. Add more water if you feel it is too thick for your taste. But remember we are adding a white sauce later.

In a small saucepan melt butter and stir in flour. Add milk and simmer until just thickened. Stir into hot stew and serve.

TIP: The key to a really flavorful hamburger stew is seasoning your hamburger well in the beginning. Bland hamburger equals bland stew.

Tuesday, April 27, 2010

Southwestern Smoked Sausage Skillet Meal

I am always searching for a good recipe that uses smoked sausage. I buy the stuff thinking, this will make an easy dinner and then when I want to use it I can't seem to think of anything good to make with it. And good luck finding a good recipe. Fortunately, I had a stroke of genius this go round and looked up Hillshire Farms website, http://www.gomeat.com/ which is chock full of tasty recipes for keilbasa and smoked sausage. I loved the Southwestern flavors in this recipe and I adapted it a little to take advantage of my well stocked pantry. You can use frozen corn but I thought this was the perfect use for canned corn.

Sausage Skillet Meal
1 pkg. smoked beef or turkey sausage (If you use the turkey sausage this meal will be lower in fat but full on taste)
1 TB olive oil
1 large zuchinni finely chopped
2 cans of corn, drained or 2 Cups of frozen
1/2 onion finely chopped
1 can of black beans, drained and rinsed
2 cups of rice cooked
1/2 to 3/4 Cup salsa
1 tsp chili powder
1 Cup cheddar or monterey jack cheese, shredded
1/4 Cup chopped cilantro (optional)
Salt and pepper to taste

Heat a skillet and add a TB of olive oil. Saute over med high heat sausage, zucchinni, corn and onions for 5 to 8 minutes or until onions are tender and sausage is slightly browned.

Add black beans, rice, salsa and chil powder. Cook and stir for 5 minutes. Season with salt and pepper and top with shredded cheese and cilantro.

Tuesday, April 20, 2010

Potato Rosemary Waffles & Turkey Gravy


First, I need to take care of  a little contest business. Frieda won the dehydrated apple slices and the emergency kit. Yay Frieda! Frieda of Lovin' From the Oven loves food storage stuff and so I am so excited she gets this prize.

Featured Food Storage: Potatoes or potato pearls and turkey gravy mix.

This is one of those recipes that makes me smugly content that I decided to learn how to make good food with my food storage staples. Seriously, it makes me feel all gourmet (even though I am not) just to say I made waffles that were fragrant moist and tasted of rosemary mashed potatoes. These waffles and the gravy are proof that not every recipe that comes out of your food storage needs to be in a casserole. There are clever ways to use instant potato pearls and instant gravy packs can have their uses, especially for those of us who are gravy challenged. I rank making gravy right beneath ironing on my least fave list. If my mother -in-law is not standing mext to me in the kitchen making her completely delicious gravy or by the ironing board showing me how to iron the right way, I can guarantee that I am going to go for the shortcut. EVERY TIME. So please don't judge me over the gravy -- because the waffles definitely did not come out of a box. And they are pretty simple to make, especially if you don't have to toss the first batch because you didn't follow the directions. Ahem. . .


These really did turn out delicious and were a nice savory take on a waffle dinner. I used cubed deli turkey because I had stocked up on a big ole hefty he-man quantity of the stuff. But feel free to use canned turkey or chicken or fresh cubed turkey or chicken. The beauty of this recipe is how adaptable it is. In fact, in the true spirit of using food storage items, I exchanged the fresh mashed potatoes in this recipe with mashed potatoes made from potato pearls. I have every intention of making these again and again with both the fresh and the dehydrated version.


The Waffles (recipe adapted from Waffles From Morning to Midnight by Dorie Greenspan)


2 Russet Potatoes or enough to make 2 Cups of potato pearls rehydrated (mashed potatoes should be a little thinner consistency.)


1/4 Cup extra virgin olive oil
1 small onion, finely chopped
2/3 cup milk or amount called for dehydrated potatoes.
Salt and pepper to taste
2 large eggs
1 Cup all-purpose flour
2 tsp baking powder.
2 sprigs of fesh rosemary, rosemary should be removed from stem or 1 tsp dried. Roughly chop fresh rosemary.

1 Packet of turkey gravy mix
2 cups of cubed or shredded turkey or chicken.

If using fresh potatoes -- Peel and wash potatos. Cut into small evenly sized pieces and place in pot of cold water. Bring to a boil. Lower heat and cok until fork tender. Drain and reserve about 1/2 cup of potato water. Set aside.

If using dehydrated potatoes or potato pearls - Measure out about 2 cups of potato pearls into a large bowl.

Heat olive oil in a small skillet over low hat and saute the chopped onion just until barely softened. Pour the oil and onion over the potatoes. Add rosemary.

Add milk to skillet and heat on low until just before boiling. (small bubbles will form around edge of pan.) Add milk to potato mixture and whip or mash until smooth and slightly looser than normal mashed potatoes. If it is too stiff add poato water little by little.

Season with salt and pepper.

Preheat the waffle iron and lightly grease. Preheat oven to 200 degrees farenheit.

Finish the batter by beating eggs into the potatoes.

Combine the flour and baking powder in a seperate bowl and then fold into potatoes using a spatula.

Spoon 1/2 cup batter onto waffle maker and smooth evenly to withing a an inchof the edges. Bake until brown and crisp. Keep waffles in oven to keep warm

Prepare turkey gravy while waffles are cooking. Make according to package directions.

Heat turkey in the microwave to warm up.

Top waffles with turkey and gravy..

Tip: It is spring and herbs are available at your local nurseries for the same price as a box of them costs in the produce section. Instead of buying a box of rosemary. Go buy a plant and plant it in your kitchen or outside for rosemary all season long.

Friday, March 26, 2010

Roast Beef Turnovers with Au Jus


Featured Food Storage or Pantry Item: Canned Beef,onion soup mix
Suggested Pantry Item: Au Jus mix. A fast fix for those busy nights.

Maybe I just like to say the word "Au Jus." I did take French for six years, my grandmother was French, I have been to France. Au Jus just makes me feel special. And apparently it makes my children feel special too. Because they were just delighted to use their fingers to dip these little turnovers into their own au jus. The rest of this recipe is definitely simple. I did not roast my beef all day in the oven. I can almost see my Grandma meme's lips puckering in displeasure. No, I experimented with my food storage canned roast beef and gravy. Seriously, I love that stuff. As far as canned meat goes, I am a fan of beef. However this recipe will go just as well with homemade roast beef. I love that stuff too. In fact, this is a perfect recipe for those roast beef leftovers. 

The pastry on these is easy to make and has a nice tangy subtle flavor that accents the beef and Au Jus. Plus they are just fun. The original recipe called for cottage cheese. I used sour cream -- because that is what I had. These are a fun dish that have made it into my big black book of recipes. They are keepers and fun for the kids.

Crust
1 C margarine
1 C sour cream or cottage cheese
2 to 2 1/2 Cups of flour
Dash of Salt

Filling
1 16 oz can of beef in gravy
1/2 pkg onion soup mix

Au Jus --
Au Jus Mix and water

Preheat oven to 375 degrees.

Combine crust ingredients (start with 2 cups of flour) and mix until dough forms ball. If dough is too moist add flour in small increments until desired consistency. Dough will be a little sticky but should make a ball and should be easy to roll out.

Roll out dough on a floured board and cut softball size circles. I just used the top of a glass tumbler. This made about 15 turnovers. Place circles on a parchment paper lined cookie sheet

Combine filling ingredients and place  heaping tablespoon in center of each circle. Fold over to make half circle. Pinch closed and seal with the tines of a fork. Bake for approximately 30 mins, or until golden and firm.

Heat au jus mix and water on stove according to directions. Serve with warm roast beef turnovers.

Monday, March 22, 2010

Freeze Dried Stroganoff Review

Calling all food storage and emergency preparedness fanatics.
Before
  After

I am so excited to review one of the products I recieved from The Ready Store. I am really excited about this site I recently discovered online. I called and asked if I could review some of their product for this blog and you would not believe the haul of stuff they sent me. I will be doing more than one review of their products in the next couple weeks. The online store has everything from MREs to freeze dried meals in bulk to emergency kits. I am so loving them. In their freeze dried food, they carry two well-known brands Saratoga Farms and Mountain House. Occasionally, I want to stock up on some freeze dried food. Yes, it is expensive but it so much tastier than the plain old dehydrated stuff (which they also carry). I love that I don't have to go scouring the shelves of my limited store sources in town to find what I need.


So on to the first review. We are big lovers of stroganoff in this family. And so when The Ready Store sent me a can of their Mountain House Freeze Dried Stroganoff to try, I thought to myself, "We shall see." Now I am not saying this stroganoff turned out as delicious as my homemade stroganoff. It did not. But it was good! And we gobbled it up. It was a little reminiscent of hamburger helper (although this stuff includes the meat) but my girls don't like hamburger helper and they liked this. There is also no MSG in the ingredients.

It was ridiculously simple to make. Add boiling water and let set. The simplicity and the taste lends itself to many uses. It comes in both #10 cans, four-serving packs and single-serving packs (there are lots of other main dishes available). I will say that once it the #10 is open it suggests using within a week. Which can be tricky if you only need 5 servings at once. (#10 can has 10 servings) however if you need to feed a crowd, the #10 can is perfect and I will be purchasing a couple of these (despite the price tag) for my food storage. See #4 tip for a way to use leftover servings within a week.

5 Ways to use Freeze Dried Stroganoff
1. Camping. This is a perfect meal for a camping trip. Boil the necessary amount of water and then soak the mix. Done and hearty, tasty and low maintenance.

2. College Students - When my brother was in college he literally ate the same thing every day. It was ridiculous. But give a college boy a #10 can of this stuff and he has a week of meals for $26.49. What a perfect care package gift.

3. Food Storage - Freeze dried food is always expensive. But if you are stocking your food storage it is a good idea to have a few simple meals that require nothing more than water to prepare.

4. Hot Lunches - One serving requires 1 Cup mix and 3/4 Cup water. Use any leftovers from the #10 cans for lunches. Prepare and place in an insulated soup tin. With 11 grams of protein it packs a good energy punch.


5. 72 hour Kits - Buy the individual packs or four-serving pack for your 72 Hour kits. They come in waterproof space saving bags that make them perfect for emergency meals.

Next week I will review one of their other products. You can also check out their store by clicking on the badge on the side of this blog.

Saturday, March 6, 2010

Baked Sausage, Spinach 4 Cheese Penne

This baked penne turned out so addicting, I am sitting here two days later craving more. Wow it was good. Of course, I am self avowed pasta addict but this creamy cheesy pasta dish has me hooked. The surprising part for me (this recipe is the result of a sample from Bertolli courtesy of the Foodbuzz tastemaker program) is that it involves using a canned cream sauce. I actually have issues with most canned Italian cream sauces. They always have a funny consistency and aftertaste to me. I am kind of a fresh cream sauce snob. So I went into the review of Bertolli's new 4 Cheese Rosa Sauce with a little trepidation. I wanted to love it. I mean look at the gorgeous package they sent me. But as I said I have past issues with cream sauce. I decided to do a little alteration on one of the recipes they sent me.

Two reasons for this recipe: It sounded like it was right up my alley and secondly, I have a friend who reads this blog that has told me she needs recipes for her Italian sausage. So, Heather this one is for you and for anyone else that needs an absolutely decadent grown up version of baked mac and cheese. We have mentioned my cheapness on this blog before and I rarely buy pre-made sauces unless they are the cheapo Hunts or I make it from scratch.

So, I priced out Bertolli sauces today; because seriously I have every intention of keeping a bottle of this stuff in my pantry just so I can have it on hand to whip up a delish dish for company. Bertolli sauces run about $2.50 to $3 in my neck of woods. But considering the large quantity this dish makes I think it is worth the splurge. Because this dish really can feed 8 to 10 people (Excuse me, am I gushing).

Without further ado my new favorite Rosa Cream sauce pasta dish:


1 Cup ricotta cheese
2 Cups shredded Italian cheese mix or mozarella.
1 Tb dried basil
1 egg, slightly beaten
1/8 tsp pepper
1 lb Italian sausage removed from casings and cooked and crumbled
1 cup fresh spinach
1 jar Bertolli Four Cheese Rosa Sauce
8 oz of penne or rigatoni pasta, cooked and drained
2 Tb Italian seasoned dry bread crumbs
2 Tb grated parmesan cheese

Preheat oven to 350 degrees. Cook sausage until brown. Saute spinach in sausage drippings until slightly wilted. Combine ricotta cheese, 1 1/2 Cups shredded cheese, basil, egg, and pepper. Toss hot rigatoni with sauce, sausage and spinach in large casserole dish (11 x 7-inch). Stir in ricotta mixture.
Top with remaining shredded cheese, bread crumbs and parmesan. Bake covered for 25 minutes. Remove cover and bake an additional 5 minutes or until bread crumbs and cheese begins to brown and cheese is melted.

Next I am going to give their arrabbiata sauce a try.

LinkWithin

Blog Widget by LinkWithin